Appearance
Assets
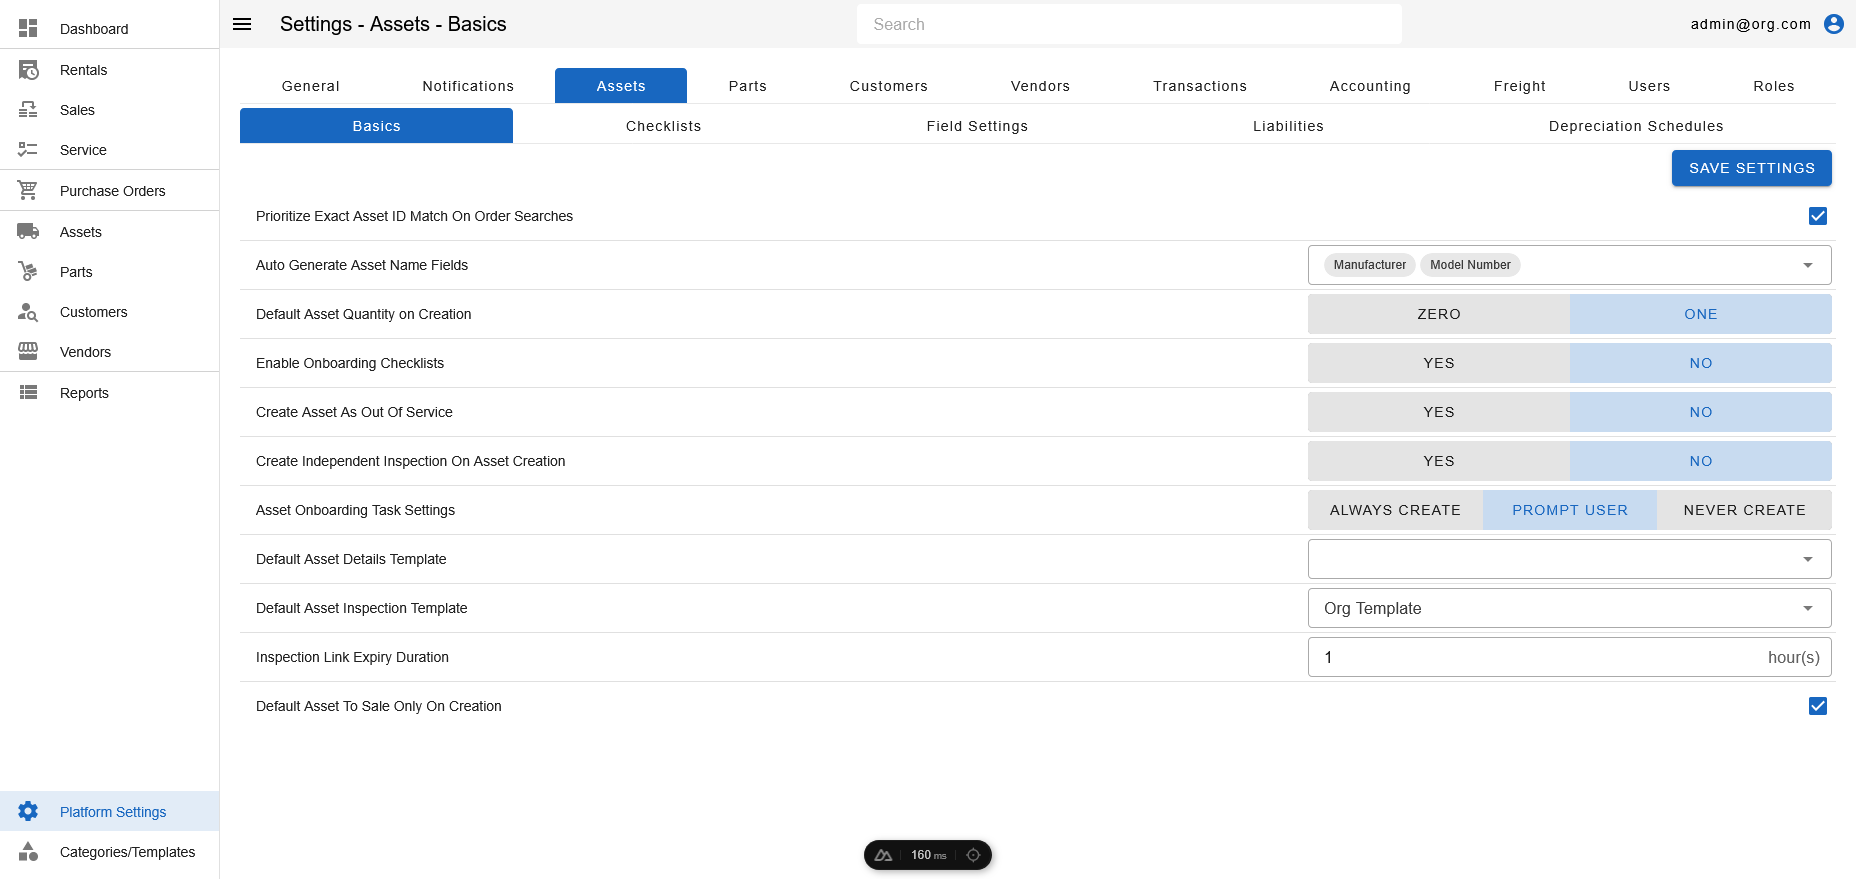
To view the Assets Page, head to the Platform Settings Page via links available on the Left Navigation Bar and click on the Assets Tab (if not already selected).
The Assets Page allows viewing/modifying settings pertaining to assets.
The Basics Tab allows viewing/modifying the following settings:
- Prioritize Exact Asset ID Match: This setting controls how user views results when searching for assets on orders. If checked, an exact match for an asset ID will be shown first. If not checked, search will smartly show less used alternatives first.
- Auto Generate Asset Name Fields: This setting controls what fields are used to auto generate Asset Name
- Default Asset Quantity On Creation: This setting controls the default initial quantity of an asset on creation.
- Enable Onboarding Checklists: This setting allows controlling whether or not an asset is screened via onboarding checklists on creation.
- Create Asset as Out Of Service: This setting controls whether or not an asset is put out of service on creation.
- Create Independent Inspection On Asset Creation: This setting controls whether or not an independent inspection is created for an asset on creation.
- Asset On-Boarding Task Settings: This setting controls how on-boarding tasks are created for assets
- Default Asset Details Template: The default template used to collect details on assets, if the asset's category does not provide a dedicated template.
- Default Asset Inspection Template: The default template used for asset inspections, if the asset's category does not provide a dedicated template.
- Inspection Link Expiry Duration: This setting controls the number of hours before a public inspection link expires.
- Default Asset To
Sale OnlyOn Creation: This setting controls the default transaction group that an asset is created in. This setting is only a default, and can still be modified during asset creation.
To modify information, simply edit the field and click on the Save Settings button to sync settings with the server.